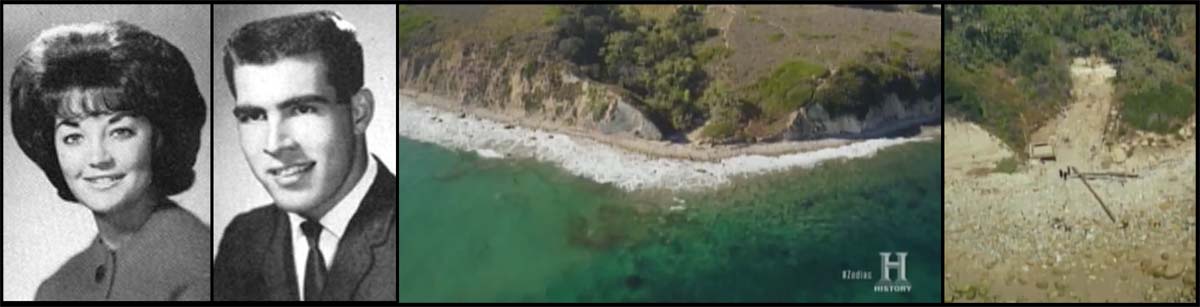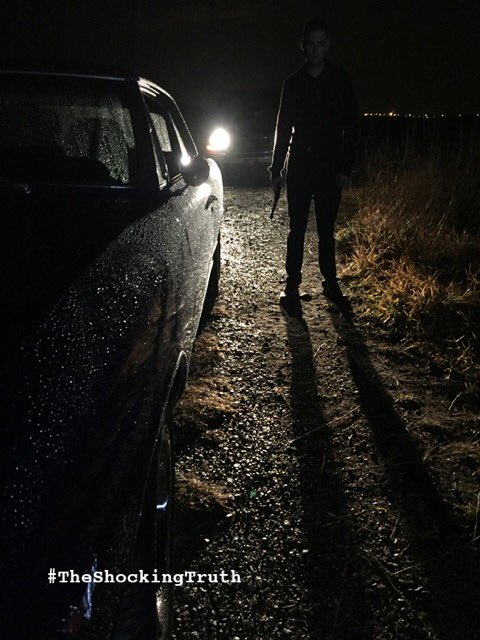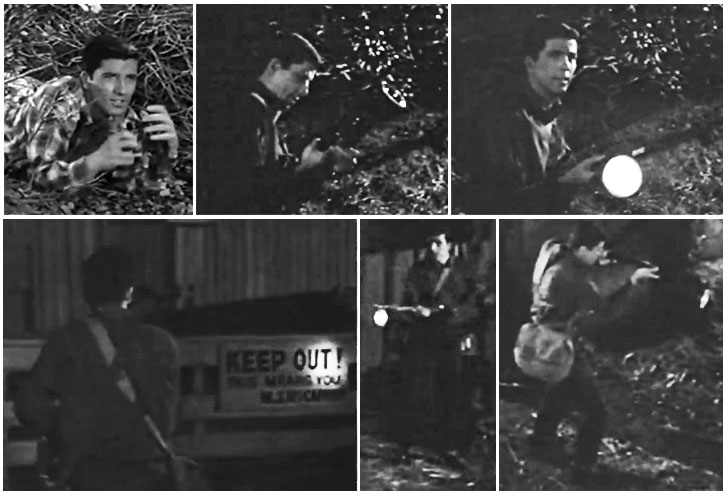
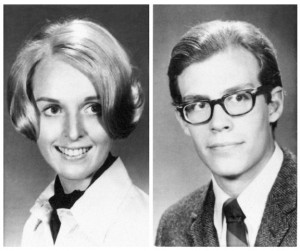
Forty-seven years ago, college students Cecelia Shepard and Bryan Hartnell were sitting by Lake Berryessa enjoying a relaxing visit. They did not know that a man was nearby, watching and waiting for the right moment to set his plan in motion.
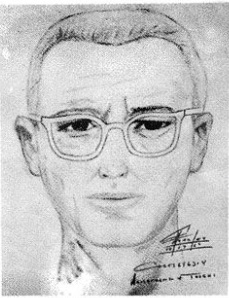
Bryan heard some noise and asked Cecelia to look around for the source. She saw a man as he moved behind a tree. Cecelia and Bryan dismissed the man as harmless and did not notice as he donned a dark hood featuring the symbol of a white crossed-circle.
The stranger came prepared with a some pre-cut lengths of clothesline to restrain Bryan and Cecelia. On his belt, a sheath held a foot-long knife and the holster for the gun in his hand. The man needed the gun to prevent Bryan and Cecelia from running away if they began to suspect his true intentions. He would lie to them and keep them calm with the promise that he meant no harm. Once they complied and were subdued, the man would no longer need the gun and could proceed with his plan.
The hooded stranger moved toward the couple. Cecelia saw him coming and said, “Oh my God, he’s got a gun.” Bryan and Cecelia watched as the hooded stranger walked onto the narrow patch of land surrounded by water and blocked their only escape route.
Bryan and Cecelia stared at the man with a gun in his hand. Later, Bryan Hartnell would write a transcript of his conversation with the stranger.
FOR NAPA COUNTY SHERIFF’S OFFICE
-DIALOGUE BETWEEN AN UNKNOWN ASSAILANT AND BRYAN HARTNELL ( and Cecelia Shepard )
CECELIA: What do you want?
ASSAILANT: Now take it easy– all I want’s your money. There is nothing to worry about– all I want is your money.
BRYAN: O.K.– whatever you say, I want you to know that I will cooperate so you don’t have to worry – whatever you say we’ll do. Do you want us to come up with our hands up or down?
ASSAILANT: Just don’t make any fast moves– come up slowly.
BRYAN: But we don’t have any money – all I have is 75 cents.
ASSAILANT: That doesn’t matter– every little bit helps ( pause )– I’m on my way to Mexico– I escaped from Deer Lodge Prison in Montana, Deer Lodge. I need some money to get there.
BRYAN: You’re welcome to the money I have, but isn’t there something else I can do for you? Give you a check or get some more?
ASSAILANT: No.
BRYAN: I can give you my phone number and you can call me.
ASSAILANT: ( no reply )
BRYAN: I want to get in contact with you. I am a sociology major and maybe I can even offer you more help than you think you need.
ASSAILANT: No.
BRYAN: Well, is there any other thing you need?
ASSAILANT: Yes. One more thing– I want your car keys. My car is hot.
BRYAN: (Reaching into pockets, then patting his first front then back pockets) I guess in all the excitement I don’t remember where I put them. Let’s see. Are they in my shirt, in the ignition, on the blanket… Say! Would you answer a question for me? I’ve always wondered. On TV movies and in an article in the Reader’s Digest they say that thieves really keep their guns loaded?
ASSAILANT: ( excited slightly ) Yes, it is! ( then calmed and matter-of-fact ) I killed a couple of men before.
BRYAN: What? I didn’t hear you…
ASSAILANT: I killed a couple of guards getting out of prison. And I’m not afraid to kill again.
CECELIA: Bryan– do what he says!
ASSAILANT: Now I want the girl to tie you up.
[A]: (reaches for rope that he pulls from back pocket)
BRYAN: This is really strange. I wonder why someone hasn’t thought of this before. I’ll bet there’s good money in it.
ASSAILANT: ( no reply )
BRYAN: What was the name of that prison?
ASSAILANT: ( no reply )
BRYAN: No really, what did you say the name of it was? I’m just curious.
ASSAILANT: ( begrudgingly ) Deer Lodge in Montana.
( There must have been some dialogue at this point but I can’t remember any until we are both tied up. )
ASSAILANT: Now I want you both to lay face down so I can tie up your feet.
BRYAN: Come on– we could be out here for a long time and it could get cold at night.
ASSAILANT: Come on– get down!
BRYAN: Listen, I didn’t complain when you tied our hands, but this is ridiculous…
ASSAILANT: I told you…
BRYAN: We aren’t going anywhere– Anyway, I don’t think that it’s necessary ( or – Aw, come on, we don’t want to. )
ASSAILANT: ( pointing gun directly at me at point blank range ) I told you to get down!
BRYAN: Your hands are shaking? Are you nervous?
ASSAILANT: Yes, I guess so. ( laughs in a very relaxed manner )
BRYAN: Well, I guess that I’d be nervous, too.
( Then after we were tied and hog-tied )
BRYAN: Now that everything is all said and done, could you show me that your gun is loaded? (Or, and probably this: “Now that all is said and done, was that gun really loaded?”)
ASSAILANT: Yes, it was! ( or ) Sure, I’ll show you. ( He then opened cartridge or whatever )
(That was the last thing I remember him saying.)
( signed ) BRYAN HARTNELL
Later, Bryan described what happened next. “And so I saw him put away his gun, and I was turning to say something to Celia, and all of a sudden I felt my back…just…no, I don’t think I saw him pull it out… I don’t remember… I think I saw him whip it out his knife and just start stabbing me in the back… CHOMP, CHOMP, CHOMP, CHOMP! I was just (makes guttural sound)… you know, that kind of a sound..”
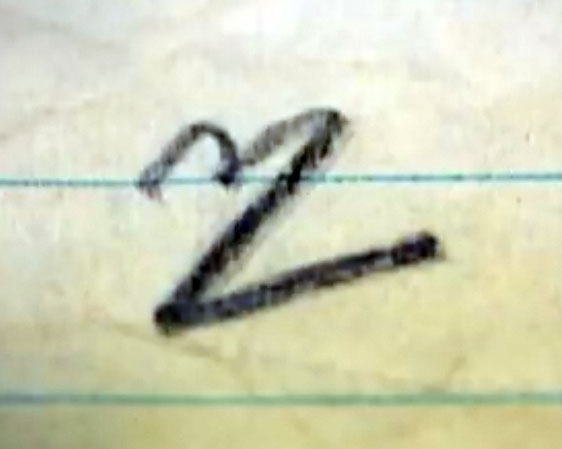
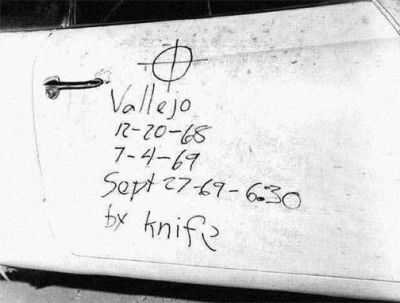
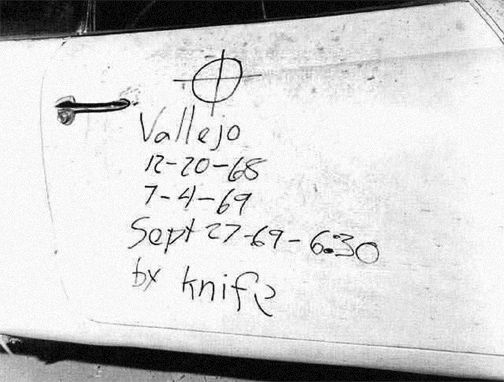
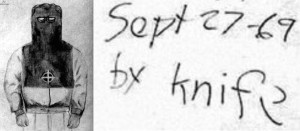
The man kept stabbing until Bryan feigned death. The man then stabbed Cecelia over and over again. When he was finished, the stranger walked back to the road. He took out a black marker and wrote a message on the passenger door of Bryan’s white Volkswagen Karmann Ghia.

A passing fisherman alerted authorities and Bryan and Cecelia were later taken to a hospital. At 7:40 PM, the Napa Police Department received a call from a telephone booth at a local car wash. Officer David Slaight answered the call.
The voice of a young man addressed Slaight in a calm, deliberate tone. “I want to report a murder– no, a double murder. They are two miles north of park headquarters. They were in a white Volkswagen Kharmann Ghia.” Slaight waited for the man to continue, but the declaration was followed by silence. After a brief pause, he asked, “Where are you now?” The voice grew quiet as the mysterious caller replied, “I’m the one who did it.” The caller then set the receiver down, leaving the line open. Police traced the call but the man was gone.
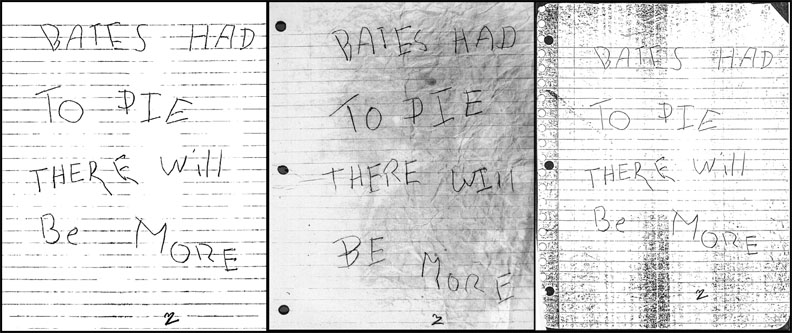
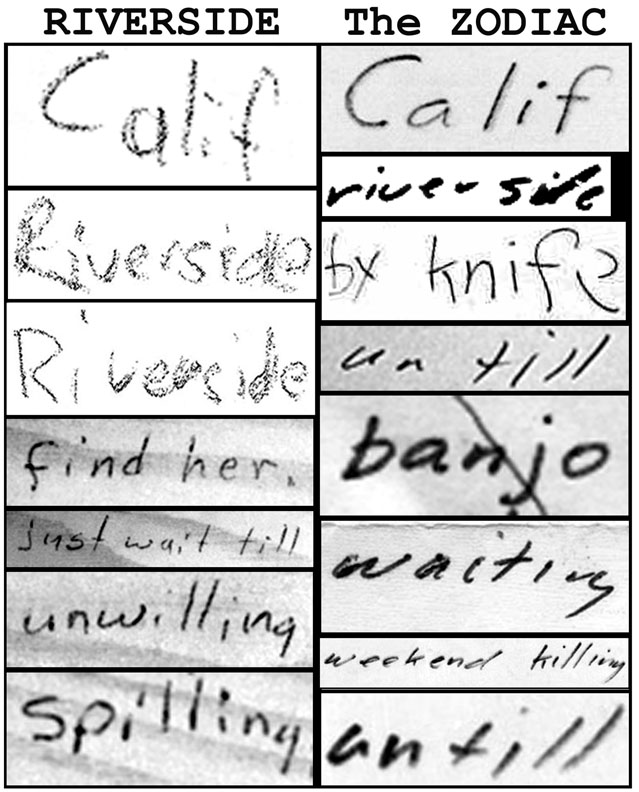
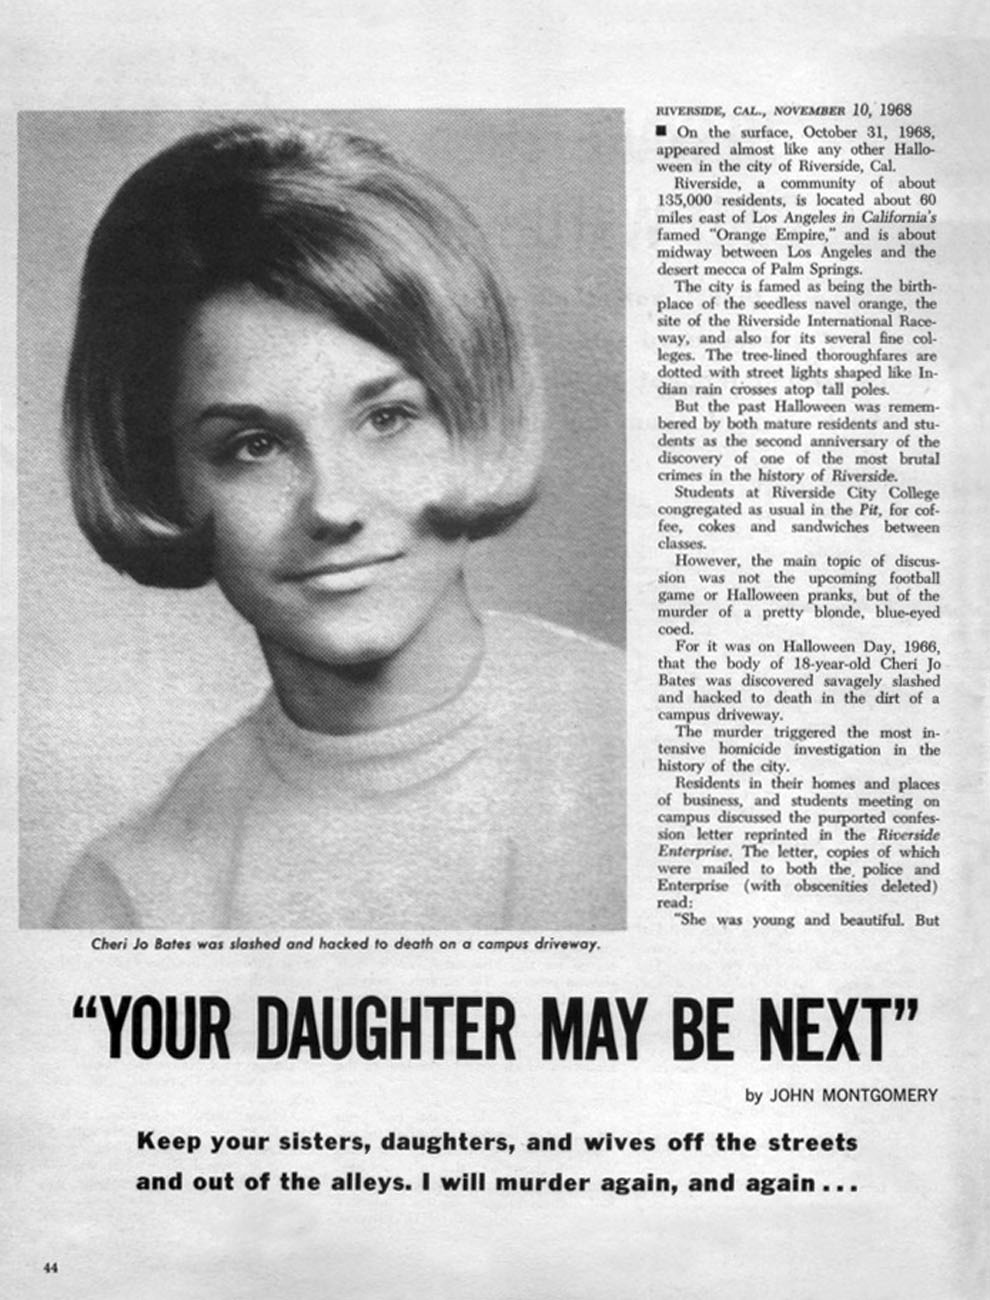
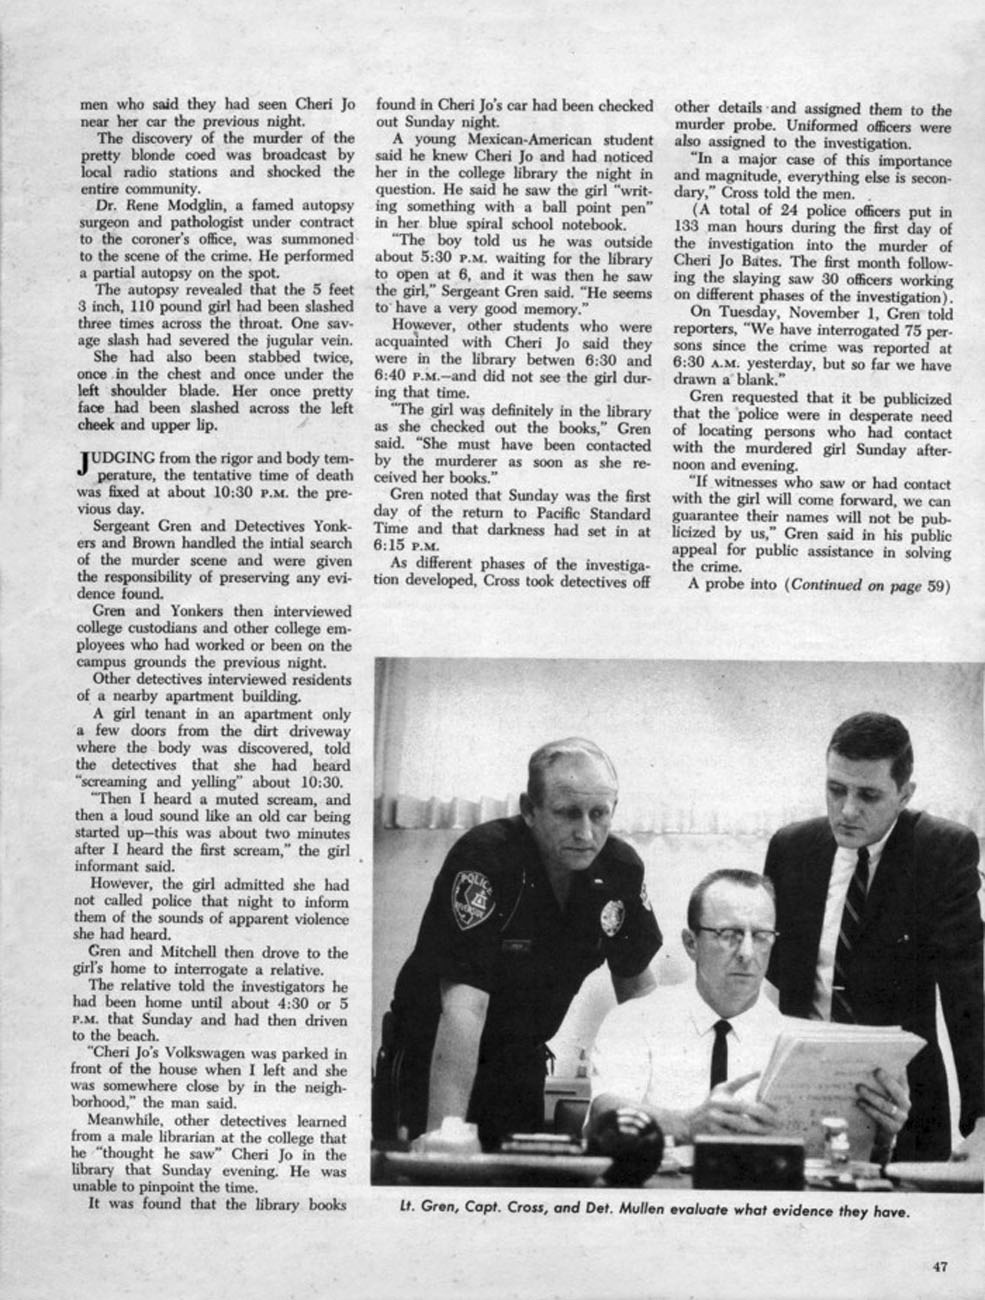
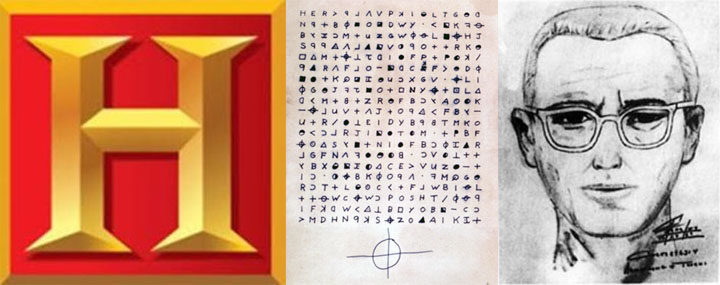
Bryan described the costume and the crossed-circle symbol, and the message on the car door also included a crossed-circle. Authorities recognized the symbol as the signature of a murderer who sent taunting letters to Bay Area newspapers and claimed that he was responsible for the shootings of two young couples. He threatened to kill again if the newspapers did not print a cipher which he claimed would reveal his identity. When deciphered, the message began with the words, “I like killing people because it’s so much fun.” The writer also referred to collecting “slaves” for his afterlife. Police asked the writer to send another letter with details about the crimes to prove that he was responsible. Days later, another letter arrived, but this time the writer coined a phrase which would become infamous in true crime history, “This is the Zodiac speaking.” The evidence indicated that Bryan and Cecelia were the next victims in the Zodiac’s deadly fantasy.
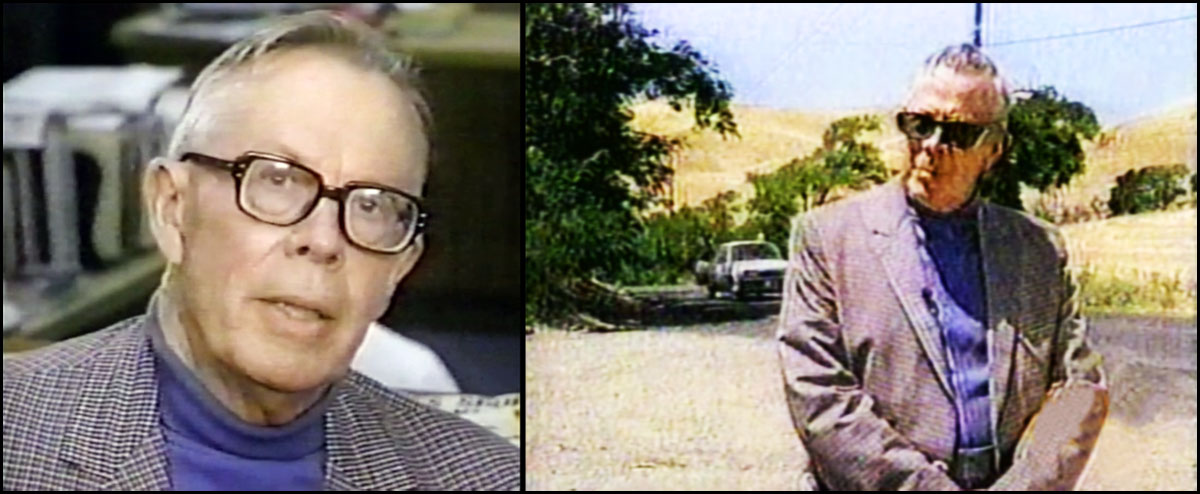
Cecelia Shepard died, but Bryan Hartnell survived. Bryan’s story was the only reason that the world learned about the killer’s bizarre costume and the odd conversation before the attack. This brief glimpse remains the best portrait of the Zodiac available, and Bryan’s account remains a chilling look into the mind of the killer. The man pointed a gun and Bryan said, “Your hands are shaking, Are you nervous?” The man laughed and replied, “Yes, I guess so.” The man was nervous because he knew what was going to happen next.
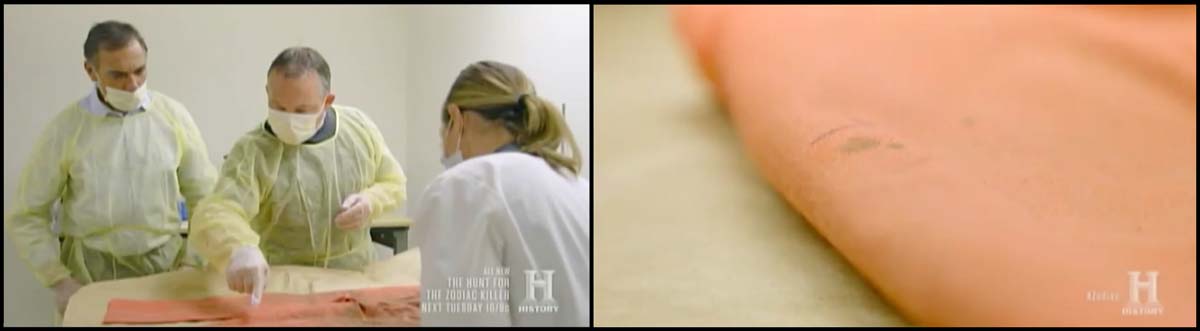
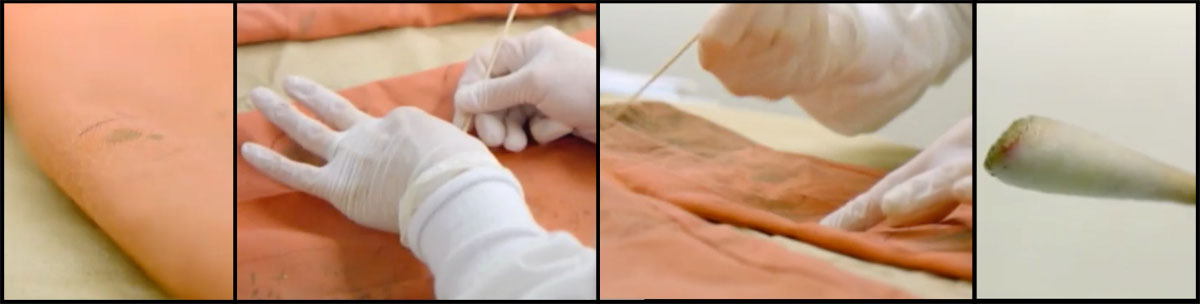
The evidence demonstrated that the killer had planned carefully by pre-cutting the sections of clothesline he used to restrain the victims. The gun forced the victims to submit to the killer’s demands. The lie about the simple robbery lulled the victims into a false sense of security. Accepting the lie, the victims allowed themselves to be tied and subdued. Once they were no longer a threat, the killer stabbed the victims without warning or provocation. The killer then walked away and wrote a message on Bryan’s car. After the attack, the killer travelled more than twenty-five miles and called police to report the crime from a payphone. All of these actions indicated that the Zodiac planned this crime.
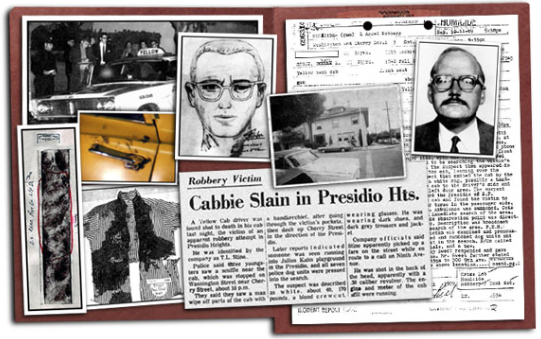
The killer‘s interaction with Bryan and Cecelia demonstrated his ability to improvise and remain calm while deceiving the victims. In the next attack, the killer shot a cab driver who believed he was delivering a harmless passenger to a routine destination. This crime indicated the killer’s desire or need for deception and his ability to manipulate his victims. The first and second attacks were ambush-style shootings which further indicated the killer’s use of deception and surprise. Bryan and Cecelia followed the killer’s instructions because they had been deceived, and the Zodiac relied on this deception to execute his plans. After the attack, Bryan played over the events in his mind and questioned his decisions. “I mean I wanted to get that gun,” he said. “There was a time when I think I could have gotten it.” On that day, the Zodiac came prepared to carry out a cold-blooded attack which included the brutal stabbing of innocent people. Bryan thought he was dealing with a common criminal, but the Zodiac most likely planned for that scenario and Bryan could have died in any attempt to escape.
The story of what happened at Lake Berryessa could have died with Bryan Hartnell. The blade of the knife came close to his heart, but a matter of inches helped Bryan survive to share his personal nightmare and his encounter with the most-wanted serial killer in American history. Bryan’s account provided the only look at the Zodiac in action, and his story remains a crucial tool in all efforts to understand the unsolved mystery.
————–
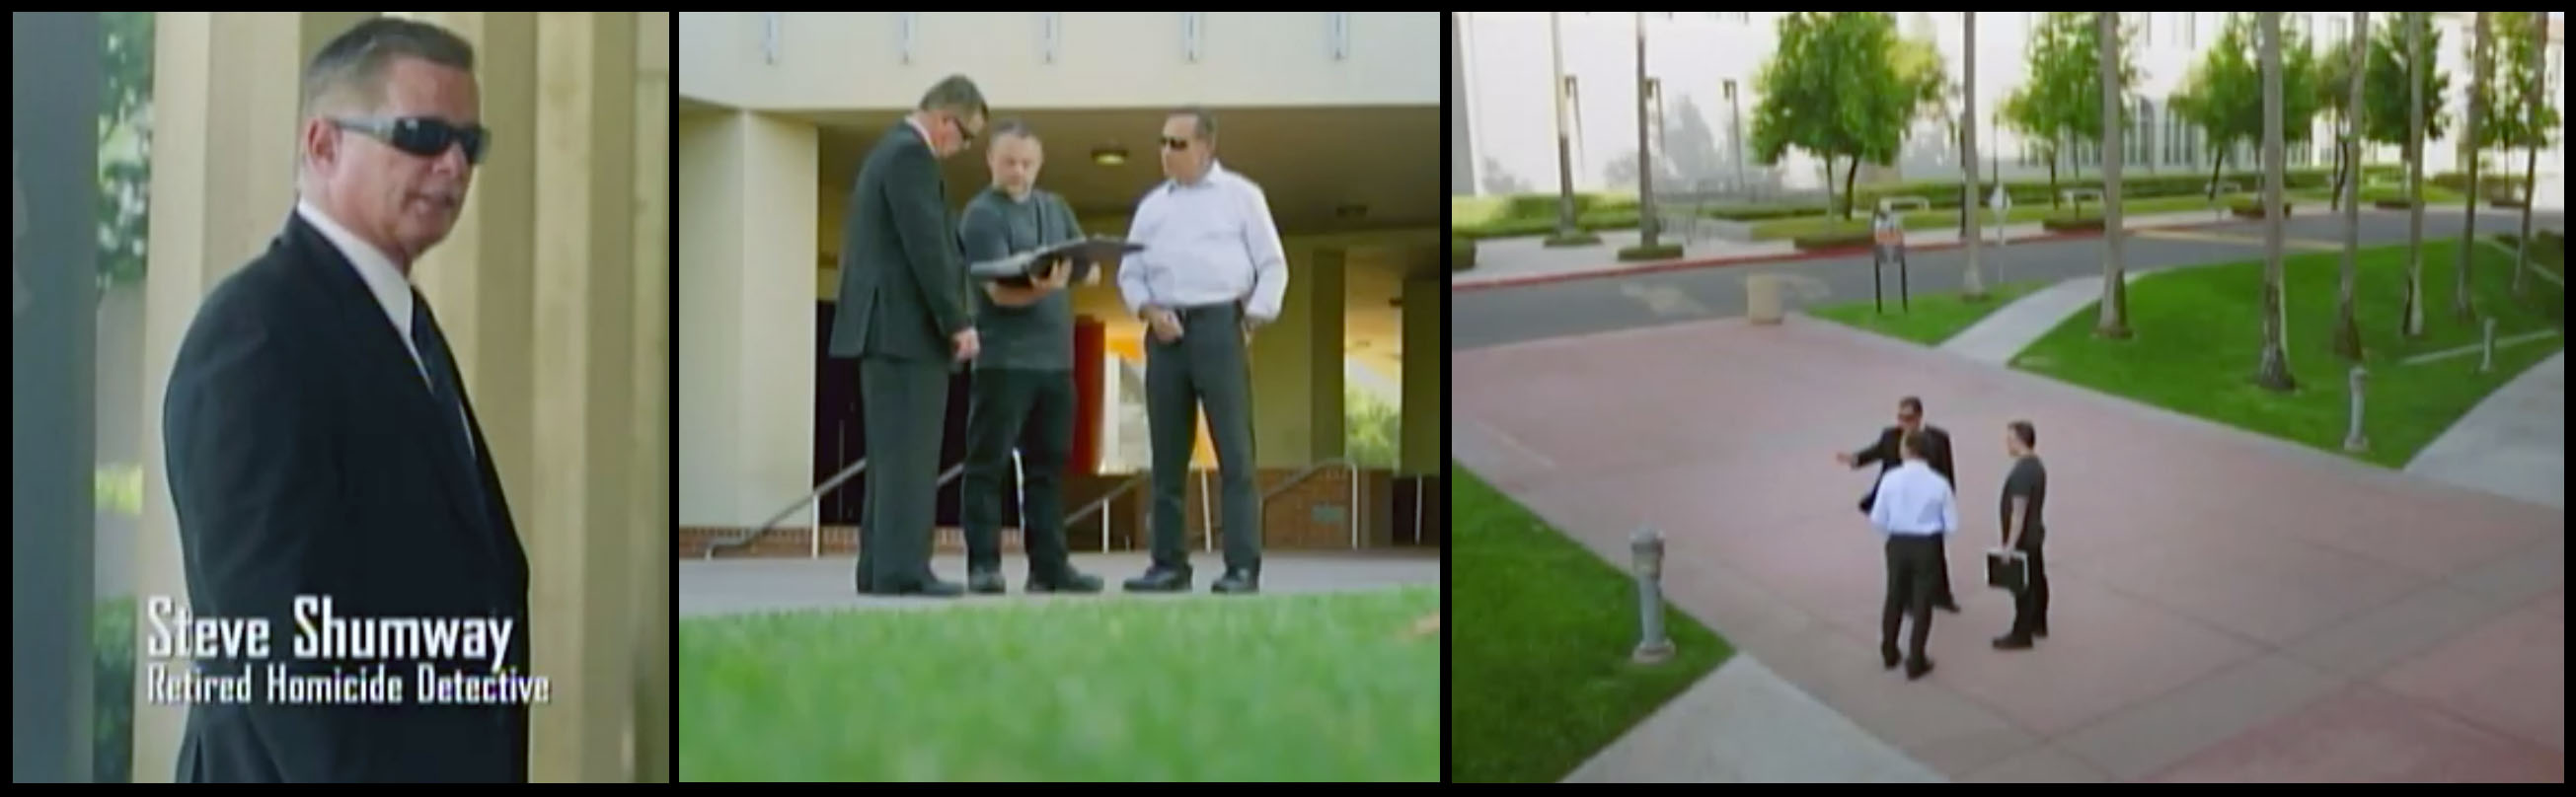
Michael Butterfield is a writer and a recognized expert on the unsolved “Zodiac” crimes. He has served as a media source and consultant for news articles, television documentaries, and director David Fincher’s major motion picture Zodiac. Michael Butterfield appears in the Zodiac documentary Case Reopened and The History Channel series MysteryQuest. He has been a featured guest on Ireland’s Sean Moncrieff Show, The Fringe Radio Show, and House of Mystery with Alan R. Warren. He is also a contributing author for the eZine True Crime: Case Files and the two volume collection of essays titled A History of Evil in Popular Culture, both available at Amazon.com.
—————–
Read more about the Lake Berryessa case:
THE VICTIMS
* Bryan Hartnell and Cecelia Shepard
THE SCENE OF THE CRIME
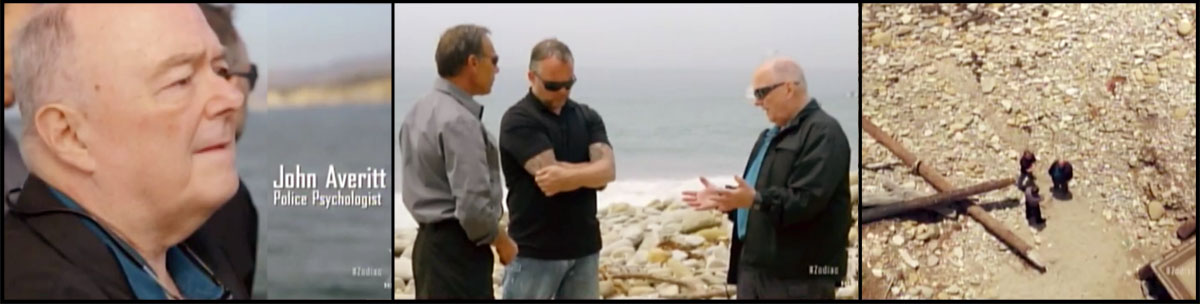
* Lake Berryessa, September 1969
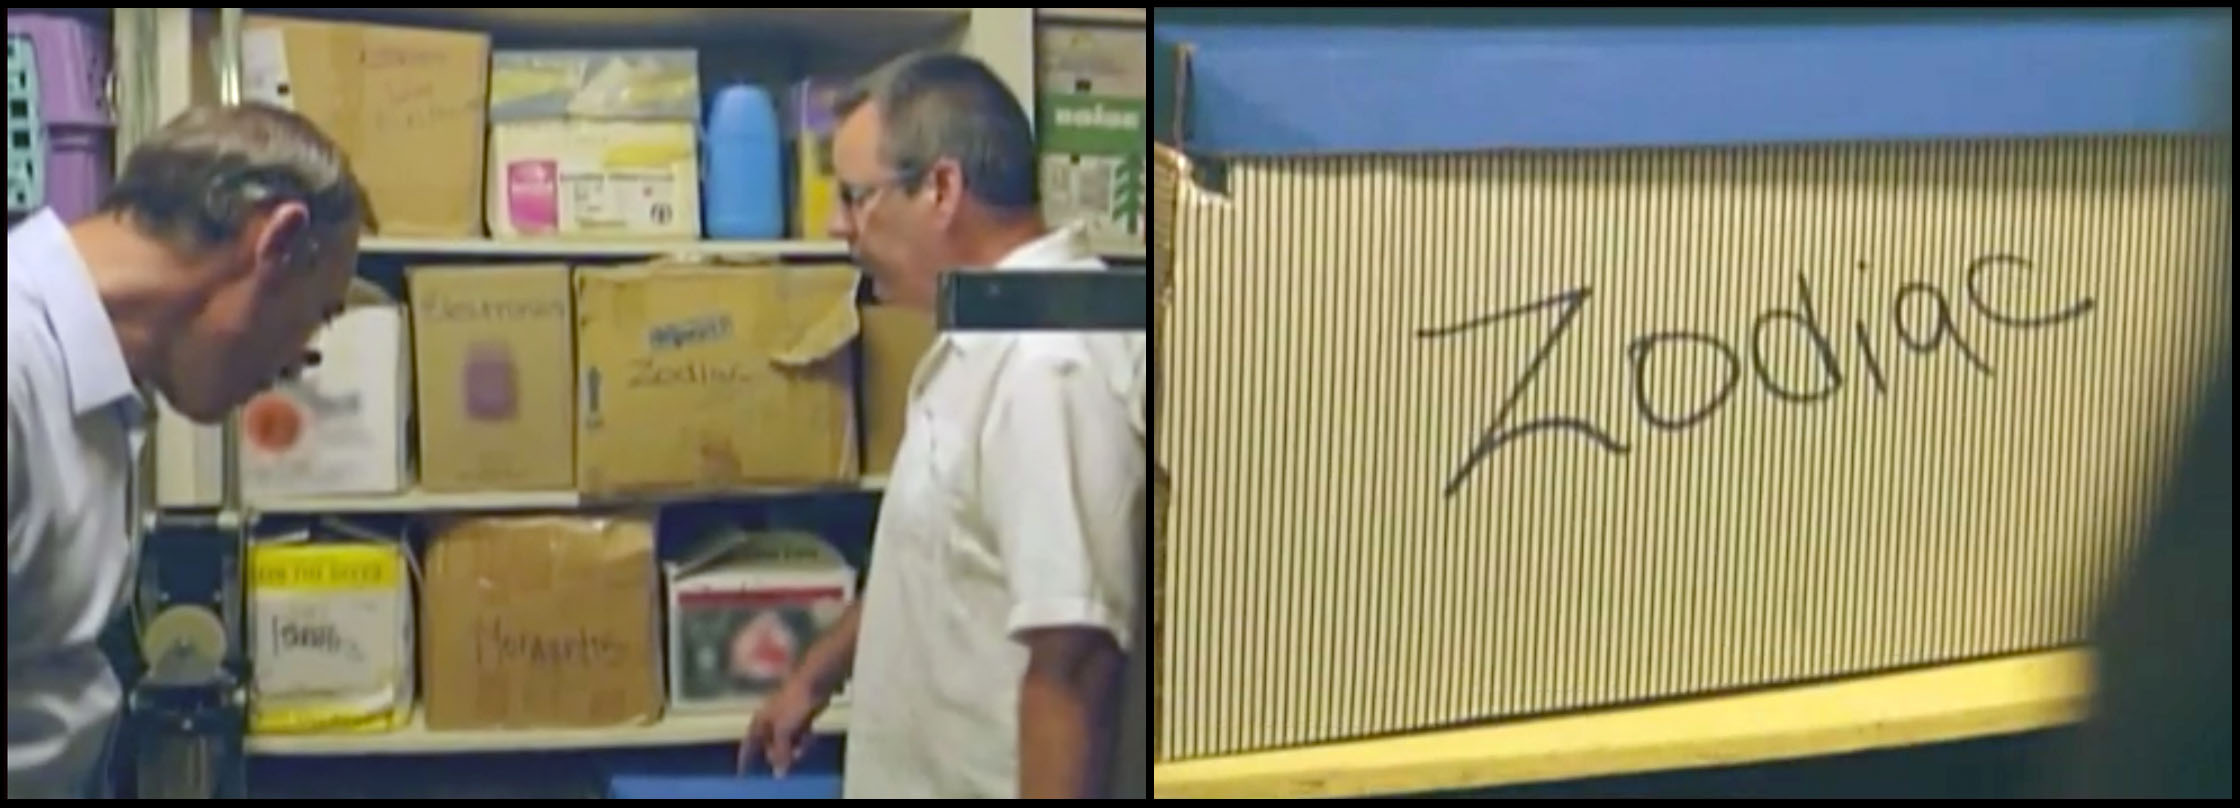
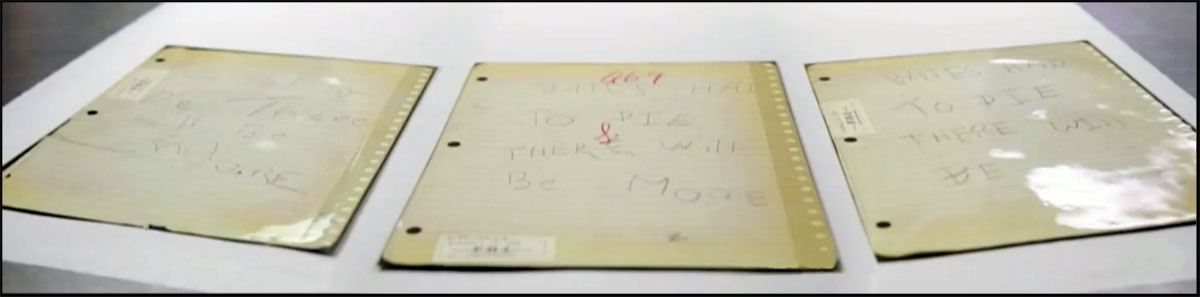
The Zodiac’s Message: The Car Door
* Photographs of the car door
* Video of the car door
The Evidence:
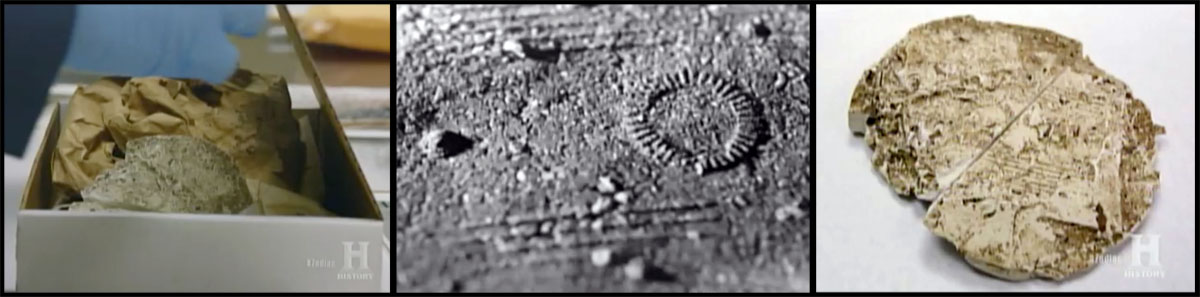
* The Boot Prints and Clothesline
The Phone Booth
* Photographs of the Phone Used By The Zodiac to Call The Napa Police Department
THE SUSPECT and PERSONS OF INTEREST
* Sketches of the Zodiac in costume and a man seen at the lake
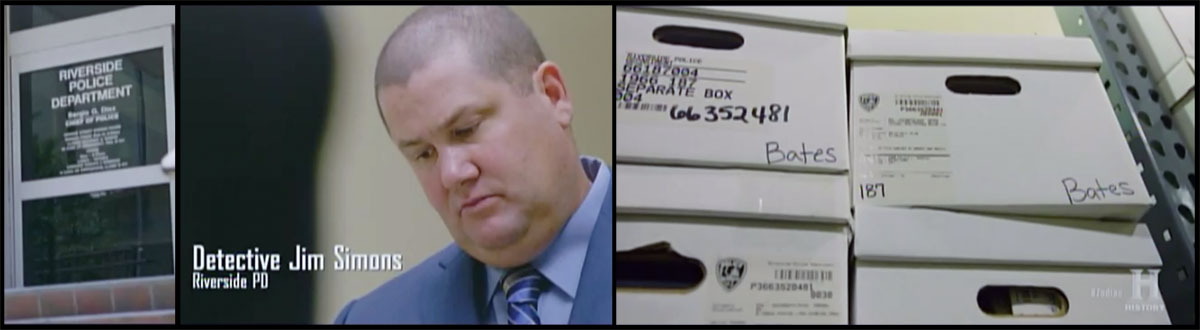
THE DOCUMENTS
Read the reports produced by the Napa County Sheriff’s Department and other agencies, including:
* NCSD Report: Ken Narlow and others (19 pages)
* NCSD Report: Hal Snook (4 pages)
* NCSD Report: Collins and Land (6 pages – one page missing)
* NCSD Report: RE: the three girls at the lake (1 page)
* NCSD Report: RE: Gun used by the Zodiac (1 page)
* Napa Police Department: Report by Dispatcher David Slaight re: Zodiac call (1 page)
* FBI Report: re: Fingerprints (3 pages)
* CA Dept. Of Justice/CII Report (2 pages)
* CA Highway Patrol Report: RE: Bryan Hartnell’s car (1 page)
* Transcript: Interview with Bryan Hartnell (13 pages)
* Transcript: Written account by Bryan Hartnell (2 pages)
VIDEOS
* Video of the car door
* Interview with Park Ranger William White
* Interviews with NCSD Capt. Donald Townsend
* Bryan Hartnell’s Hospital Interview for TV News